Remove Glasses Glare With Photoshop: Easy Tutorial
Photoshop’s Lasso Tool is an easy way to remove glare spots from photos.

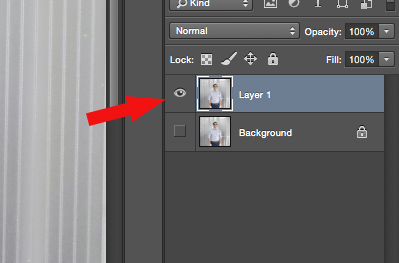
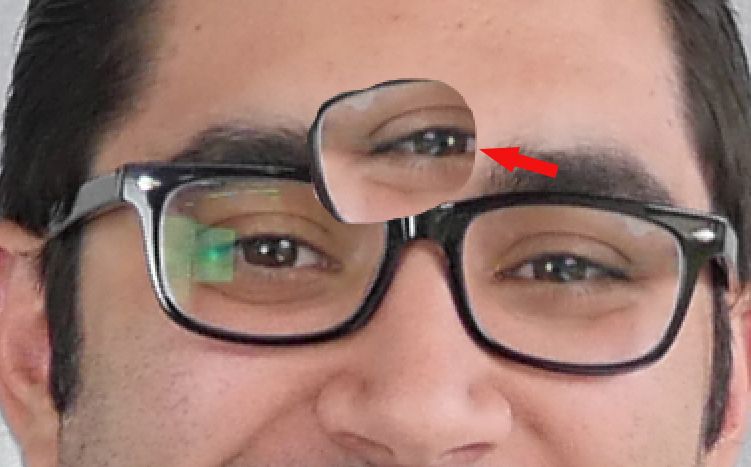
The subject’s right eye above has an annoying green glare from the camera’s flash.
Don’t let bright reflections from a camera flash detract from a friend or family member’s face. As you can see in the photo above, a bright green glare is taking up a large section of the subject’s right eye. This tutorial walks you through how to get rid of it in a matter of minutes.
Just stick the image in Photoshop to simply and quickly remove any glare from your favorite pictures using the handy Lasso Tool. Wearing glasses should be a fashion statement, so show off your eyewear and what’s behind the lens by perfecting photos before uploading and sharing.
Instructions:
Step 1: Load the image into Photoshop.
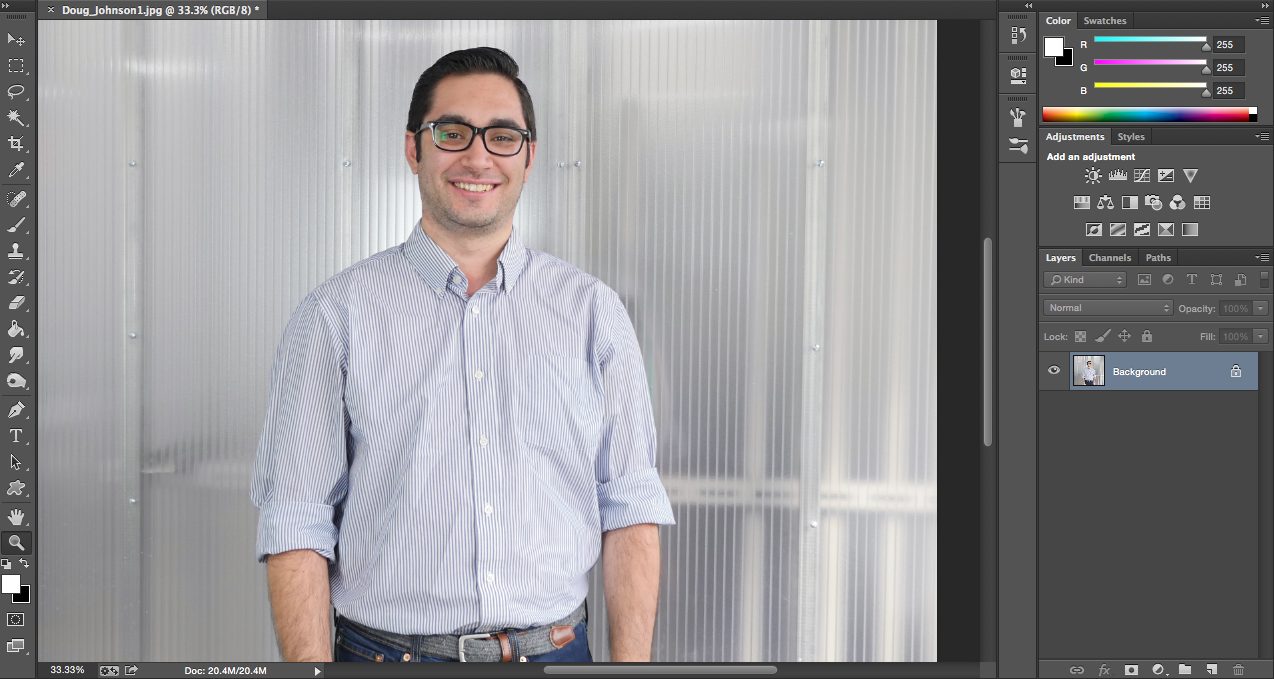
Step 2: Make a copy of the original image on a new layer so any changes can be discarded and the original image is safe in the base layer.
Press Ctrl+J (PC) or Cmd+J (Mac) to copy the original image to a new layer.
Step 3: Select the Lasso Tool by clicking on the icon or hitting the “L” hotkey.
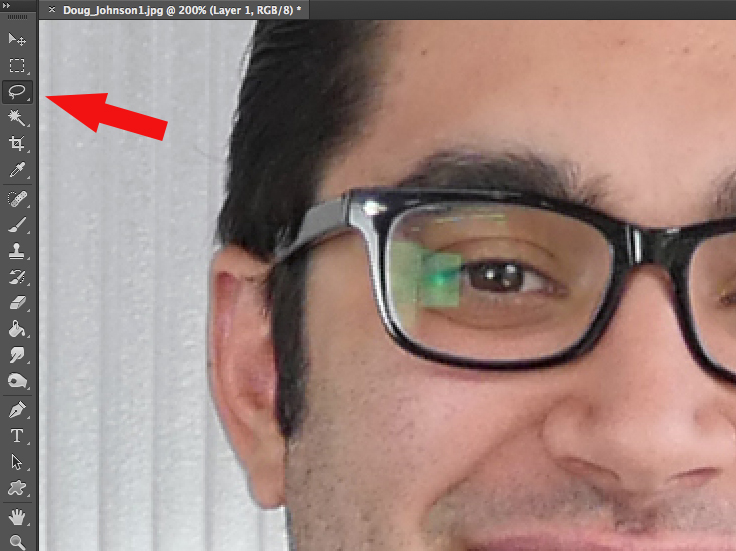
Step 4: With the Lasso Tool, select part of the other eye to replace the section blocked out by glare.
Copy and paste this selection to a new layer so you can edit it.
Step 5: Click Ctrl+C (PC) or Cmd+C (Mac) to copy the selection and then Ctrl+V (PC) or Cmd+V (Mac) to paste the copy back into Photoshop.
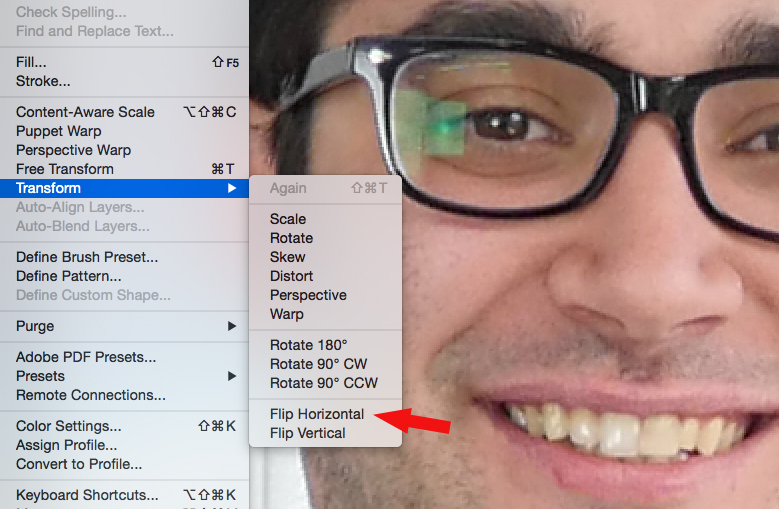
Step 6: Click Edit > Transform > Flip Horizontal to flip your copied selection to mirror the other eye.
Use the Selection Tool by using the “V” hotkey, and drag your selection over.
Step 8: Drag the selection so it lines up over the eye that’s affected by glare.
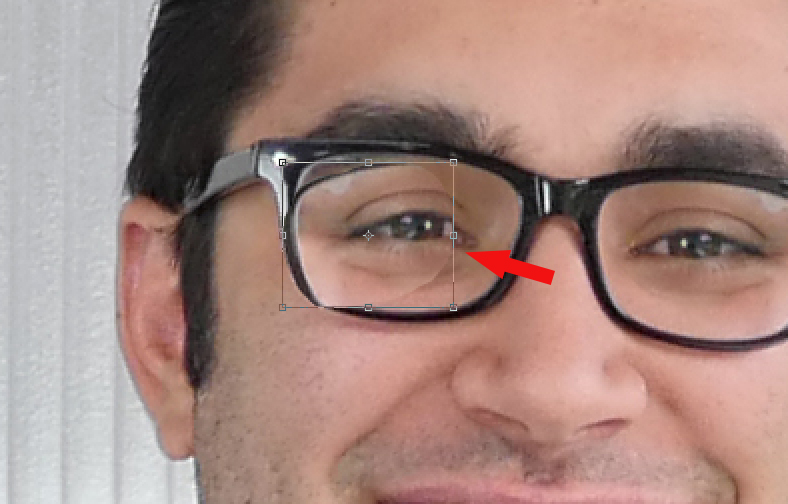
Step 9: Place the copied eye over the glared eye and click Ctr+T (PC) or Cmd+T (Mac) to Free Transform the layer.
Hold your mouse over one of the Free Transform box corners to rotate it just right. This is the most important step!
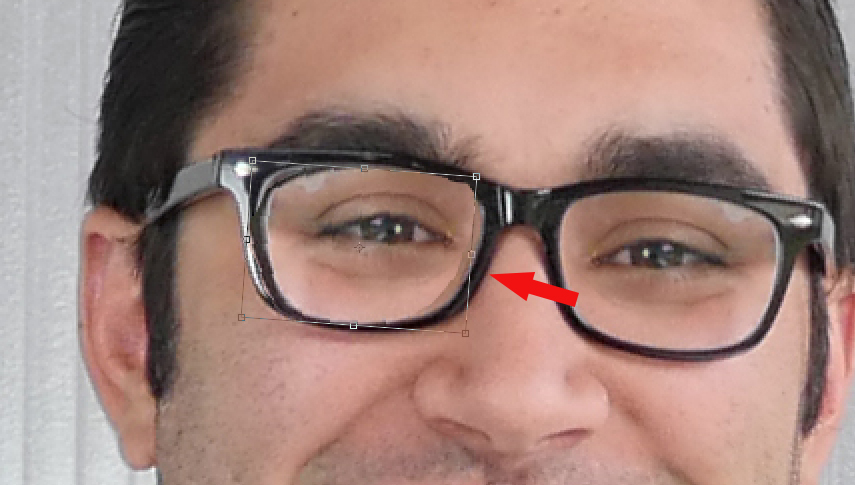
Step 10: Rotate the layer so it lines up perfectly with the eye underneath.
When blending the layer into the old, be sure not to erase too much over the glare or it will defeat the purpose.
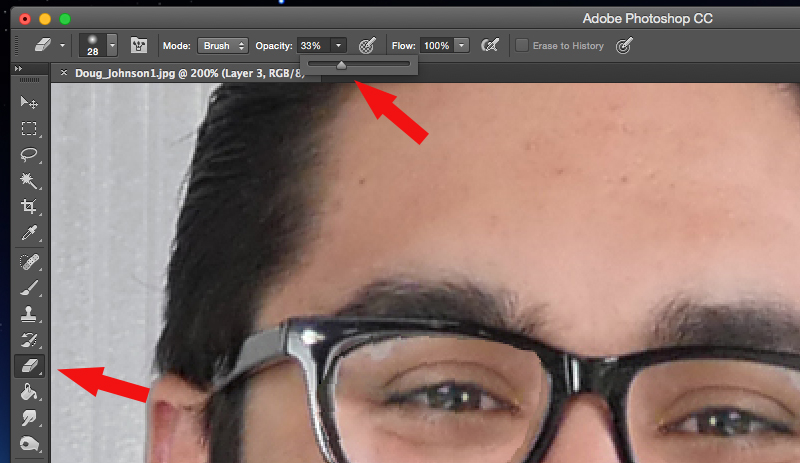
Step 11: Select the Eraser Tool and set the Opacity to around 33%. Then gently erase the lines of the new layer to blend it in with the original photo underneath.

When you’re done, you should have something like the above photo. As you can see, that annoying green glare from the camera flash is gone. Here’s a comparison so you can see the before and after of the original pictures.

That’s it for this quick tutorial. Let us know what you think in the comments below. Would also love to hear other ways you touch up glasses in your personal or professional photo shoots!


 Canada